


Unleash the Power of AI: Top GPU Server Solutions for Machine Learning and Deep Learning
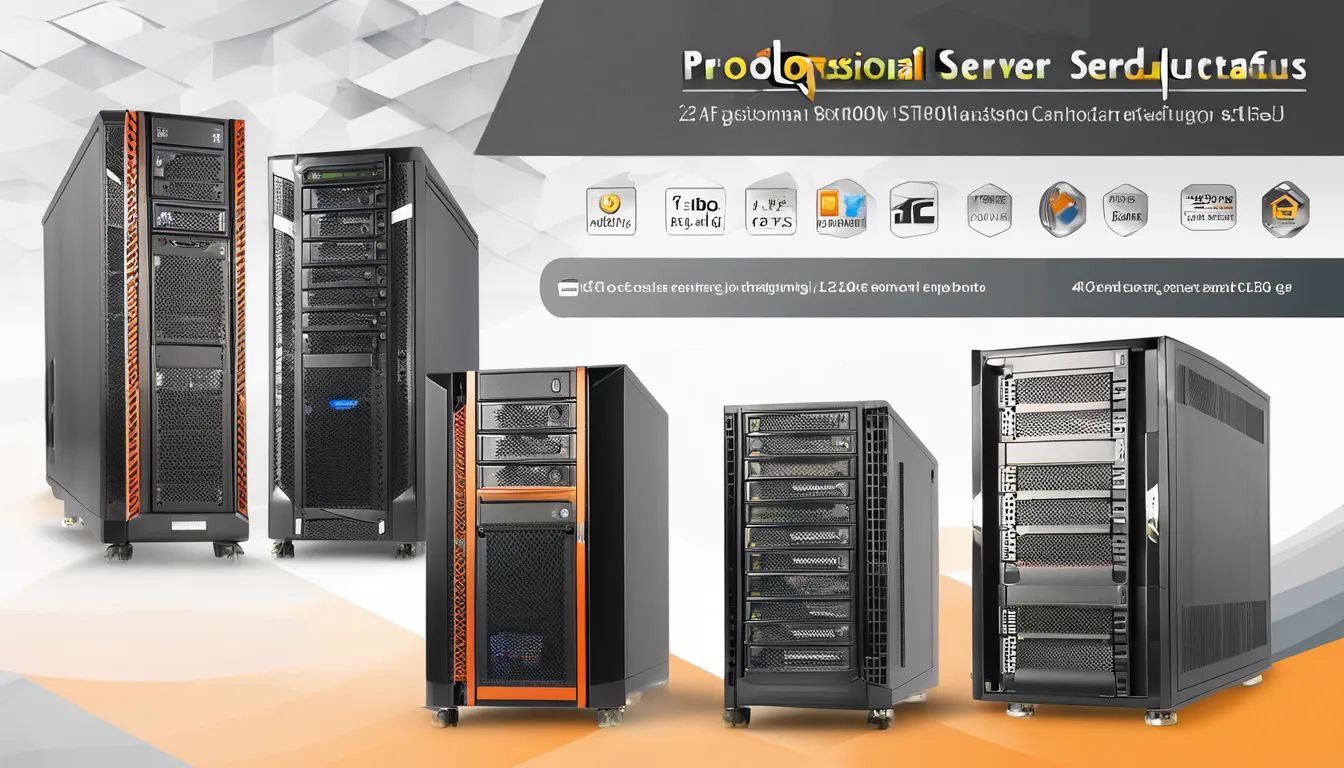
Machine learning and deep learning have transformed industries, driving innovation and efficiency across diverse sectors. At the heart of these advancements is the technology that powers them: Graphical Processing Units (GPUs). This blog explores the crucial role GPUs play in enhancing the capabilities and performance of machine learning and deep learning applications. We will delve into the most effective GPU server solutions available in the market, evaluating their specifications, performance metrics, and suitability for different computational tasks. This exploration will provide insights into how leveraging robust GPU infrastructure can optimize neural network training, reduce processing times, and facilitate seamless scaling of AI projects.
What are GPU servers and why are they essential for AI workloads?
How do GPU servers differ from traditional CPU servers?
GPU servers differ fundamentally from traditional CPU servers in their architecture and processing capabilities. While CPUs (Central Processing Units) are designed to handle a wide range of tasks sequentially using a few cores, GPUs (Graphical Processing Units) excel in handling parallel tasks through thousands of smaller cores. This parallelism enables GPUs to process large blocks of data simultaneously, making them inherently more efficient for workloads that can be parallelized. These characteristics make GPU servers particularly well-suited for handling the massive datasets and complex calculations required in AI and machine learning applications.
What makes GPUs ideal for AI and machine learning tasks?
GPUs are ideal for AI and machine learning due to their ability to perform parallel processing efficiently. This attribute is critical in training deep learning models, where the computation of numerous matrix multiplications is required. The high memory bandwidth and parallel processing power of GPUs accelerate the training of neural networks, reducing the time needed to iterate over large datasets significantly. Additionally, the flexibility of GPUs to handle both the training and inference phases of machine learning tasks greatly enhances their utility in AI applications.
Key benefits of using GPU servers for AI infrastructure
The utilization of GPU servers in AI infrastructure offers several key benefits. First and foremost, the enhanced processing power significantly reduces training times for machine learning models, leading to quicker development cycles. This is particularly important as models become more complex and data volumes continue to grow. Furthermore, GPU servers provide scalability, allowing AI developers to efficiently harness more resources as needed to handle larger datasets or more complex model architectures. This scalability ensures that AI projects can expand seamlessly without significant overhauls of the existing computing infrastructure. Ultimately, these benefits contribute to a more cost-effective and efficient AI development environment, capitalizing on the full potential of modern AI technologies.
Which NVIDIA GPUs are best suited for AI and deep learning applications?
NVIDIA A100 GPU: Features and Performance for AI Workloads
The NVIDIA A100 GPU, based on the Ampere architecture, represents a significant leap in AI computation capabilities. It features a groundbreaking design that integrates multi-instance GPU technology, allowing a single A100 to be partitioned into as many as seven independent GPUs. This enhances its versatility in handling diverse AI workloads simultaneously. The A100 boasts a staggering 19.5 teraflops of single-precision performance and includes third-generation Tensor Cores, which are optimized for both AI and high-performance computing (HPC) tasks. These enhancements facilitate impressive acceleration in training and inference processes for deep learning models, outperforming previous architectures in both efficiency and speed.
NVIDIA H100: The Latest Powerhouse for Generative AI and HPC
The NVIDIA H100 GPU, built upon the Hopper architecture, represents the cutting-edge of GPU technology tailored for the most demanding generative AI and HPC applications. It introduces the Transformer Engine, specifically designed to optimize generative AI workloads which involve complex sequences. The H100 provides exceptional computational power with significantly increased throughput and reduced latency. Its features, such as enhanced memory bandwidth and novel architectural innovations like the dynamic scaling of power consumption, make it the preferred choice for intensive AI tasks that require superior computational resources and efficiency.
Comparing NVIDIA GPU Options for Different AI Use Cases
Selecting the appropriate NVIDIA GPU for specific AI use cases depends heavily on task requirements and computational demands. For instance, the A100 is particularly well-suited for large-scale training and multi-model inference due to its efficient parallel processing capabilities and flexible instance partitioning. On the other hand, the H100 is ideal for applications requiring advanced computation performance and scalability, such as generative AI models and complex simulations in scientific research. By understanding the strengths of each GPU option, organizations can better strategize their AI infrastructure investments to optimize performance and meet specific technological goals.
How to choose the right GPU server configuration for your AI projects?
Factors to Consider When Selecting GPU Servers for AI Infrastructure
When selecting GPU servers for AI infrastructure, it is crucial to evaluate several technical and operational factors to ensure optimal performance and scalability. Key considerations include the specific AI tasks and workloads, which dictate the processing power and memory requirements. Assessing the compatibility with existing software libraries and frameworks is also important to facilitate seamless integration. Additionally, consider the power consumption and cooling requirements, as AI computations can be resource-intensive. Investing in future-proof solutions that offer scalability and flexibility to accommodate expanding workloads is essential to sustain long-term growth and operational efficiency. Moreover, understanding the total cost of ownership, including hardware, maintenance, and potential upgrades, will aid in making an informed decision.
Balancing CPU and GPU Resources in AI Server Solutions
Achieving an optimal balance between CPU and GPU resources is vital for the efficient performance of AI server solutions. CPUs typically handle tasks requiring sequential processing and general computations, but for parallel processing and higher computational loads, GPUs are indispensable. Therefore, an ideal configuration includes sufficient CPU power to support and efficiently feed data to the GPUs without creating bottlenecks. This harmonious integration enables the efficient execution of high-performance AI tasks, such as training deep learning models. Fine-tuning this balance requires an understanding of the specific demands of your AI applications, ensuring that neither resource is over or underutilized, thereby maximizing both performance and cost-efficiency.
Scaling Your GPU Server Setup for Growing AI Workloads
As AI workloads grow in complexity and size, scaling GPU server infrastructure becomes a critical challenge. To accommodate increasing demands, consider scalable architecture options that allow for seamless integration of additional GPUs without significant downtime or service interruptions. This includes implementing modular server designs that support easy expansion and the deployment of cloud-based solutions for flexible resource allocation. Additionally, employing advanced monitoring and management tools can help optimize resource usage and identify potential scalability issues early. By adopting a proactive approach to scaling, organizations can ensure they meet the dynamic computational needs of evolving AI projects, maintaining competitive performance and facilitating innovation.
What are the top GPU server solutions available in the market?
Supermicro GPU Servers: Optimized for AI and Machine Learning
Supermicro GPU servers are designed to meet the rigorous demands of AI and machine learning applications. These servers offer high-density configurations that can be tailored to specific workload requirements, leveraging the latest GPU technologies to deliver exceptional parallel processing power. The systems are engineered to provide robust performance, energy efficiency, and scalability, making them ideal for both small-scale training and large-scale deployment scenarios. By integrating advanced cooling solutions and flexible expansion options, Supermicro ensures that its servers maintain optimal operating conditions even under intensive processing loads, thereby enhancing reliability and performance.
NVIDIA DGX Systems: Purpose-Built for AI Research and Development
NVIDIA DGX systems are engineered specifically for the intricate needs of AI research and development. These systems are equipped with NVIDIA's advanced GPUs and software, providing unparalleled computational power and efficiency. DGX systems facilitate accelerated AI model development through their optimized hardware-software synergy, including features such as high-speed interconnects and comprehensive software stacks specifically designed for deep learning frameworks. By offering turnkey solutions, NVIDIA simplifies the integration and deployment processes, allowing researchers to focus more on innovation and less on infrastructure management.
Comparing 2U and 4U GPU Server Form Factors for AI Applications
When selecting a GPU server form factor for AI applications, understanding the differences between 2U and 4U configurations is crucial. A 2U form factor provides a compact and efficient solution, ideal for environments where space is at a premium. These servers typically support a moderate number of GPUs and are suitable for smaller AI workloads or edge deployments. Conversely, a 4U form factor offers greater space for additional GPUs and enhanced cooling mechanisms, making it more suitable for heavy-duty AI tasks that require extensive computational resources. The choice between 2U and 4U will largely depend on specific workload needs, available data center space, and energy considerations.
How can GPU servers accelerate AI training and inference processes?
Leveraging Tensor Core GPUs for Faster AI Model Training
Tensor Core GPUs, developed by NVIDIA, are specifically engineered to accelerate the training of AI models by enhancing computational efficiency and throughput. These specialized cores facilitate mixed-precision calculations, which allow AI models to process data with a combination of 16-bit and 32-bit floating-point operations. This capability significantly reduces the computational load without sacrificing accuracy, resulting in faster training times and improved resource utilization. Tensor Cores also support operations like convolution and matrix multiplication, which are fundamental to deep learning architectures, thus providing a substantial boost in training large-scale models.
Optimizing GPU Memory Usage for Efficient AI Inference
Optimizing GPU memory usage is pivotal for effective AI inference, particularly when deploying models in real-time environments or on edge devices. Efficient memory use enables larger batch sizes and more complex models to be processed simultaneously, reducing latency and improving throughput. Techniques such as memory pooling, batching, and model quantization are employed to maximize memory utilization. By reducing the memory footprint, these strategies help enhance performance while maintaining the accuracy and reliability of AI predictions.
Parallel Processing Capabilities of Multi-GPU Server Configurations
Multi-GPU server configurations leverage parallel processing capabilities to accelerate AI workloads by distributing computational tasks across several GPUs simultaneously. This architecture is particularly beneficial for large-scale training scenarios and high-dimensional data processing tasks, as it enables concurrent execution and significant reductions in processing times. Techniques such as data parallelism and model parallelism are typically used to optimize task distribution across GPUs, improving both scalability and efficiency. By leveraging the collective power of multiple GPUs, AI systems can achieve unprecedented performance levels, enabling the rapid development and deployment of complex models.
What are the common challenges in deploying GPU servers for AI infrastructure?
Cooling and Power Requirements for High-Performance GPU Servers
High-performance GPU servers necessitate robust cooling solutions to dissipate the significant heat generated during intensive computing tasks. Efficient cooling mechanisms, such as liquid cooling or advanced air cooling systems, are crucial to prevent thermal throttling and maintain optimal server performance. Additionally, power requirements for these servers are substantial due to the high energy consumption of GPUs. Ensuring adequate power supply with redundancy options is essential for minimizing downtime and maintaining seamless operations.
Integrating GPU Servers with Existing Data Center Infrastructure
Integrating high-performance GPU servers into existing data center infrastructure presents several challenges, including compatibility with current networking and storage solutions. It is imperative to assess and potentially upgrade the facility's networking architecture to support the increased data transfer rates required by GPUs. Moreover, the existing power and cooling systems must be evaluated to ensure they can accommodate the added demands of GPU servers. Strategic planning and implementation are key to achieving a seamless integration that boosts capacity without compromising efficiency.
Managing and Monitoring GPU Resources in AI Workloads
Effective management and monitoring of GPU resources are vital for maximizing performance in AI workloads. Utilizing advanced software tools and platforms for real-time monitoring ensures that system components are operating efficiently and can promptly address any resource bottlenecks or failures. Techniques such as dynamic resource allocation and load balancing are employed to optimize the distribution of GPU resources, thus enhancing overall workload performance. Proper management also involves regular maintenance and updating of software drivers and frameworks to ensure compatibility and per https://gpuservercase.com/ mance enhancements with evolving AI applications.
How are GPU servers driving innovations in AI research and generative AI?
Enabling Breakthrough AI Models with Scalable GPU Compute Power
GPU servers play a crucial role in enabling groundbreaking AI models by providing scalable compute power that accommodates the increasing complexity and size of these models. As the demand for high-performance deep learning applications continues to rise, scalable GPU solutions ensure that compute resources can be efficiently expanded to meet the processing requirements. This capability allows researchers and developers to iterate faster and innovate by training larger models that are capable of achieving higher accuracy and more sophisticated results. Additionally, GPU servers support parallel processing, which significantly reduces the training time of deep neural networks, facilitating the rapid development of cutting-edge AI solutions.
GPU Servers' Role in Advancing Natural Language Processing and Computer Vision
In the realm of natural language processing (NLP) and computer vision, GPU servers have become indispensable tools due to their unparalleled ability to process and analyze vast amounts of data rapidly. NLP tasks, including language translation, sentiment analysis, and text generation, benefit from GPU-accelerated processing, which allows for more complex modeling and understanding of linguistic patterns. Similarly, in computer vision, GPUs enable real-time image recognition, facial analysis, and object detection applications by handling the massive computational workload these tasks demand. The parallel processing capabilities of GPU servers enhance the efficiency and throughput of vision and language models, driving innovation and broader application possibilities.
Future Trends in GPU Server Technology for AI and Machine Learning
The future of GPU server technology in AI and machine learning is aligned with continued advancements aimed at enhancing performance, efficiency, and integration. One promising trend is the development of GPUs with more specialized cores designed to accelerate specific machine learning tasks, such as tensor operations. Moreover, energy efficiency improvements are becoming increasingly crucial as organizations seek to reduce operational costs and environmental impact. Another significant trend is the incorporation of advanced software frameworks and AI platforms that offer efficient resource management and ease of scaling across diverse infrastructure. The increasing adoption of edge computing will also push the evolution of GPU technology, enabling AI processing closer to data sources and reducing latency in real-time applications.
Marble s Versatility Furniture for Every Room

As you consider the design of your home or office, you’re likely looking for materials that can elevate the aesthetic and functionality of each room. Marble, with its unique veining and color patterns, is an ideal choice for furniture in every space. You can use it to create statement pieces, like marble-topped coffee tables or dining tables, or incorporate it into accent furniture to add depth and visual interest. But how can you effectively incorporate marble into each room of your home or office to achieve a cohesive, sophisticated look? That’s what we’ll explore next.
Marble Living Room Furniture
Marble living room furniture adds a touch of luxury and sophistication to your space. You can incorporate marble into your living room through a statement piece, such as a marble-topped coffee table or a sleek marble console table.
This not only elevates the aesthetic of your room but also creates a sense of drama and elegance.
When choosing marble living room furniture, consider the style and color of the marble. White Carrara marble, for example, can create a bright and airy feel, while darker marbles like Nero Marquina can add a sense of depth and mystery.
You can also mix marble with other materials, such as wood or metal, to create a unique and eye-catching look.
To get the most out of your marble living room furniture, consider the traffic and usage of the room. A marble coffee table, for instance, may not be the best choice for a family room with young children.
However, a marble console table or side table can be a beautiful and low-maintenance option for a grey marble dining table set mal living room.
Elevating the Dining Space
A well-designed dining space can elevate the entire home, and incorporating marble furniture is an excellent way to achieve this. You can start by adding a marble dining table, which immediately becomes the focal point of the room.
Its elegance and sophistication will undoubtedly make a statement, setting the tone for a refined dining experience.
To complement your marble dining table, consider incorporating marble chairs or a marble-topped sideboard.
These additions won’t only enhance the aesthetic of the room but also create a sense of cohesion. Marble’s versatility allows you to mix and match it with various styles, from modern to traditional, ensuring that it will fit seamlessly into your existing décor.
When choosing marble furniture for your dining space, don’t forget to consider the room’s lighting.
Marble’s unique veining and color patterns will be accentuated by the right lighting, making the space feel even more luxurious.
Marble in the Bedroom
Your home’s most intimate spaces can benefit greatly from the elegance of marble, and the bedroom is no exception.
A well-placed marble piece can instantly elevate the ambiance of your bedroom, adding a touch of sophistication and refinement.
Some popular ways to incorporate marble into your bedroom include:
- Marble-topped nightstands: Add a touch of glamour to your bedside with marble-topped nightstands that exude elegance and sophistication.
- Marble-clad headboards: Create a statement piece in your bedroom with a marble-clad headboard that adds a luxurious feel to the space.
- Marble-accented dressers: Incorporate marble accents into your dresser to add a touch of classic style to your bedroom furniture.
- Marble-topped benches: Use a marble-topped bench at the foot of your bed to create a cozy reading nook or a convenient spot to put on shoes.
Luxurious Marble Office Pieces
Elevating your workspace to new heights of sophistication just got a whole lot easier with luxurious marble office pieces. When it comes to creating a professional and elegant office space, marble is a top choice.
You can opt for a marble-topped desk, which will undoubtedly become the focal point of your office. Marble desks aren’t only visually stunning but also incredibly durable, withstanding the wear and tear of daily use.
Pair your marble desk with a matching marble bookcase or shelves to create a cohesive and polished look. Marble office pieces can also add a touch of glamour to your meeting room.
Consider a marble conference table or a marble-topped side table to elevate the ambiance of your meetings.
Marble office pieces aren’t limited to traditional designs. You can find modern and sleek marble pieces that will blend seamlessly with your contemporary office decor.
Whether you’re a business owner or an entrepreneur, luxurious marble office pieces will help you create a workspace that exudes sophistication and professionalism. By incorporating marble into your office design, you’ll be making a statement that reflects your style and success.
Marble Accent Furniture Pieces
While marble office pieces can serve as stunning focal points, incorporating marble accent furniture pieces can add depth and visual interest to your workspace.
These accents can be used to break up large spaces or to create a sense of continuity between different areas of your office. You can choose from a variety of marble accent furniture pieces to create a unique and stylish workspace.
Consider the following marble accent furniture pieces to enhance your office:
- Marble Side Tables: Add a touch of elegance to your office with marble side tables. They can be used as a convenient place to set your coffee cup or as a display surface for decorative items.
- Marble Bookends: Keep your bookshelves organized and add a decorative touch with marble bookends.
- Marble Paperweights: Use marble paperweights to keep your papers in order and add a touch of sophistication to your desk.
- Marble Desk Clocks: Add a sense of luxury to your office with a marble desk clock.
Conclusion
As you explore marble’s versatility in furniture, you’ll find it can elevate any room in your home or office. With its unique veining and color patterns, marble adds a touch of sophistication and elegance to living spaces, dining areas, bedrooms, and workspaces. Whether you choose statement pieces or accent furniture, marble’s durability makes it a practical choice. You can create a cohesive, refined look that reflects your style and makes a lasting impression.
Why Staking Matters The StakeStone Perspective

As you consider the components that make up a thriving blockchain ecosystem, you can’t help but think about the role of staking. At StakeStone, we believe staking is more than just a way to secure a network – it’s the backbone of a decentralized system. By incentivizing validators to participate, staking fosters security, trust, and widespread adoption. But what exactly does this mean for the future of cryptocurrency and blockchain as a whole? How does staking impact not just the environment, but your wallet too? Let’s take a closer look at the significance of staking and its far-reaching implications.
The Role of Staking
As you dive into the world of cryptocurrency and blockchain technology, you’ll likely come across the concept of staking. Staking plays a crucial role in the operation and security of blockchain networks.
It involves validators or “stakers” locking up their own cryptocurrency, or “stake,” as collateral to validate transactions and create new blocks. By doing so, stakers are incentivized to act honestly and maintain the integrity of the network.
The staking process helps to secure the network in several ways. It ensures that validators are financially invested in the network, which motivates them to validate transactions correctly and prevent malicious activity.
This, in turn, maintains the trust and confidence of users, which is essential for the widespread adoption of cryptocurrency.
In proof-of-stake (PoS) consensus algorithms, staking is also used to select validators. Validators with larger stakes have a higher chance of being selected to validate transactions and create new blocks. This means that stakers with significant holdings have a greater influence on the network’s decision-making process.
Environmental Impact of Staking
Staking’s benefits for blockchain networks are clear, but it’s also important to examine its impact on the environment. You might be wondering how staking affects the planet.
The truth is, staking’s environmental footprint is significantly lower compared to traditional proof-of-work (PoW) mining methods. PoW mining requires massive amounts of energy to power computers that solve complex mathematical equations.
In contrast, staking involves validators being chosen to create new blocks based on the amount of cryptocurrency they hold, or “stake.” This process is more energy-efficient and doesn’t require the same level of computational power.
As you consider the environmental impact of staking, it’s essential to look at the broader picture.
The shift to proof-of-stake (PoS) and other more energy-efficient consensus algorithms is driving a reduction in the carbon footprint of blockchain networks. When you participate in staking, you’re supporting a more sustainable future for these networks.
Staking and Passive Income
Participating in staking can be a lucrative way to earn passive income through your cryptocurrency holdings.
You’re essentially lending your assets to a network, allowing it to validate transactions in exchange for rewards.
This model represents a significant shift from traditional investment methods, where you’d have to actively trade or invest in dividend-paying stocks.
With staking, you can generate revenue without actively managing your investments.
Here are some ways staking can help you earn passive income:
- Diversify your portfolio: By staking different cryptocurrencies, you can spread your risk across various assets, reducing your exposure to market fluctuations.
- Earn interest on your holdings: Many staking platforms offer interest rates that rival those of traditional savings accounts, allowing you to grow your wealth over time.
- Support emerging projects: By staking newer cryptocurrencies, you can support innovative projects and potentially reap the rewards of their growth.
- Automate your investments: Staking allows you to set up a recurring revenue stream, freeing you up to focus on other aspects of your life.
Blockchain Security Through Staking
Your decision to participate in staking not only generates passive income but also plays a vital role in maintaining the security of the blockchain network. By staking your tokens, you’re essentially becoming a validator, responsible for verifying transactions and creating new blocks.
This process helps to prevent malicious actors from manipulating the network, as validators must agree on the state of the blockchain.
When you stake, you’re also incentivizing other validators to act honestly. Validators with a significant stake in the network are more likely to prioritize its integrity, as they’ve a vested interest in its success.
This creates a self-sustaining ecosystem where validators are motivated to maintain the security of the network.
Through staking, you’re also contributing to the decentralization of the network. By becoming a validator, you’re helping to distribute the validation process among multiple parties, making it more difficult StakeStone a single entity to control the network.
This decentralization is crucial for maintaining the security and integrity of the blockchain. By participating in staking, you’re helping to create a more secure and robust network.
Building a Staking Ecosystem
As you begin to stake your tokens, you’re not just generating passive income – you’re also helping to build a staking ecosystem that rewards validators for their contributions to the network.
This ecosystem is crucial for the long-term health and security of the blockchain. By staking, you’re incentivizing validators to act honestly and maintain the integrity of the network.
As the staking ecosystem grows, it creates a positive feedback loop that benefits everyone involved. Here’s what you can expect:
- Increased validator participation: More validators join the network, increasing decentralization and security.
- Improved network efficiency: Validators are incentivized to optimize their operations, leading to faster transaction processing times.
- Enhanced token liquidity: The staking ecosystem attracts more participants, increasing token liquidity and reducing price volatility.
- Greater community engagement: The staking ecosystem fosters a sense of community among validators and token holders, driving innovation and collaboration.
Conclusion
You’ve seen the critical role staking plays in the blockchain ecosystem. By incentivizing validators, staking ensures network integrity and trustworthiness. It not only generates passive income but also underpins blockchain security and decentralization. As you build your staking strategy, remember that you’re contributing to a more sustainable and secure network. You’re part of a vibrant community that’s driving widespread adoption of cryptocurrency. By staking, you’re shaping the future of blockchain.
See the Difference Top Rated Glass Components for Sale

You’re looking for top-rated glass components that can elevate the quality and aesthetic of your project. With numerous options available, it’s essential to understand what sets high-end glass components apart from the rest. Top-rated glass components, such as tempered and laminated glass, boast exceptional optical clarity and durability. But what are the key characteristics that define these premium glass components, and how can you ensure you’re investing in the best? By exploring the key features and benefits of top-rated glass components, you can make an in tub glass med decision that transforms the outcome of your project.
Key Characteristics of Top-Rated Glass
When it comes to top-rated glass components, you’re likely looking for materials that offer a perfect blend of form and function. This means that the glass shouldn’t only look great but also perform well in various conditions.
Key characteristics of top-rated glass include its optical clarity, durability, and resistance to thermal stress.
Optical clarity is crucial, as it affects the visibility and transparency of the glass. Top-rated glass should have minimal distortion and imperfections, allowing you to see through it clearly.
Durability is also essential, as the glass should be able to withstand various environmental factors, such as extreme temperatures, humidity, and exposure to chemicals.
You should also look for glass components that can resist thermal stress, which can cause the glass to break or shatter. This is especially important if the glass will be exposed to sudden or extreme temperature changes.
Types of Glass Components Available
Here’s an overview of some key glass components available:
| Glass Component | Description | Application |
|---|---|---|
| Tempered Glass | Strengthened glass that’s resistant to heat and impact | Bathrooms, kitchens, and building facades |
| Laminated Glass | Layered glass that provides soundproofing and security | Office partitions, windows, and doors |
| Borosilicate Glass | Heat-resistant glass ideal for laboratory equipment | Laboratory beakers, test tubes, and medical equipment |
When shopping for glass components, you’ll come across these and many other types. Understanding the characteristics of each type will help you choose the right one for your specific needs. From construction to laboratory use, the type of glass component you choose can significantly impact the performance and safety of your project.
Factors to Consider When Buying
Your glass component purchase is a significant investment, and making the right choice depends on several key factors.
You’ll want to consider the purpose of the component, the type of glass, and the intended application.
Different types of glass have varying levels of durability, thermal resistance, and optical clarity.
When evaluating glass components, consider the following factors:
- Quality and durability: Assess the glass component’s resistance to scratches, thermal shock, and impact.
- Optical clarity and precision: Consider the level of optical clarity required for your application, and ensure the component meets those standards.
- Chemical compatibility: Verify that the glass component is compatible with any chemicals or substances it will come into contact with.
- Certifications and compliance: Check if the component meets relevant industry standards and regulatory requirements.
Top Brands in the Industry Today
Established manufacturers are at the forefront of producing high-quality glass components. When you’re searching for top-rated glass components, it’s essential to consider the most reputable brands in the industry.
Companies like Saint-Gobain, NSG, and Guardian Industries are well-known for their commitment to quality and innovative products. These manufacturers have years of experience and a proven track record of delivering exceptional glass components.
You may also want to consider brands like AGC Inc., Fuyao Glass Industry Group, and Xinyi Glass Holdings. These companies have made significant investments in research and development, ensuring their products meet the highest standards.
By partnering with top brands, you can be confident that you’re getting high-quality glass components that meet your specific needs.
When evaluating top brands, look for certifications like ISO 9001 and ISO 14001, which demonstrate a company’s commitment to quality and environmental management.
Additionally, check their product range, technical support, and customer service to ensure they can meet your requirements.
Benefits of Choosing High-Quality Glass
- Enhanced Aesthetics: High-quality glass offers a sleek and polished appearance that elevates the visual appeal of your project, making it more attractive and desirable.
- Increased Durability: Top-rated glass components are designed to withstand harsh weather conditions, heavy use, and other environmental factors, ensuring a longer lifespan for your project.
- Improved Safety: High-quality glass is less prone to breakage and shattering, reducing the risk of injury and property damage.
- Better Energy Efficiency: Some high-quality glass components are designed to minimize heat transfer, reducing energy consumption and costs while maintaining a comfortable indoor climate.
Conclusion
You’ll notice the difference with top-rated glass components, offering unparalleled quality and performance. With their exceptional optical clarity, durability, and resistance to stress and chemicals, they elevate the visual appeal of any project. Investing in these premium components ensures long-lasting results and enhanced aesthetics. By choosing high-quality glass, you’ll experience increased durability, improved safety, and reduced maintenance. Make the smart choice and select top-rated glass components for your next project.
Oral Health Drugs You Can Find at Local Pharmacies

As you walk into your local pharmacy, you’re likely to find a range of oral health products on the shelves. But do you know what options are available to you? From pain relief medications for toothaches to antibacterial mouthwashes and desensitizing toothpaste for sensitive teeth, there are numerous solutions to common oral health issues. But with so many choices, it can be difficult to know where to start. In this discussion, we’ll explore the various oral health drugs you can find at your local pharmacy, and help you determine which ones might be right for you.
Pain Relief Oral Medications
When you’re experiencing toothache or mouth pain, it’s essential to find relief quickly. Over-the-counter pain relief oral medications can help alleviate your discomfort.
Acetaminophen, such as Tylenol, is a common choice for relieving mild to moderate toothache pain. It’s available in various forms, including tablets, capsules, and liquid gels.
Another option is ibuprofen, like Advil or Motrin. This medication reduces inflammation and relieves pain, making it suitable for toothaches caused by gum inflammation or tooth abscesses. However, you should be aware of the potential side effects and interactions with other medications.
Aspirin is also an option, but it’s essential to use it cautiously. Aspirin can help with pain relief, but it may not be suitable for everyone, especially children under 18 years old.
Always read the label carefully and follow the recommended dosage instructions. Additionally, if your pain persists or worsens, it’s crucial to consult your dentist or healthcare professional for proper evaluation and treatment. They can diagnose the underlying cause of your pain and recommend the best course of treatment.
Antibacterial Mouthwash Options
While managing pain with oral medications, it’s also vital to maintain good oral hygiene to prevent infection.
You can do this by incorporating antibacterial mouthwash into your daily routine. Antibacterial mouthwash is available at most local pharmacies and can help kill bacteria that cause infections, gum disease, and bad breath.
When choosing an antibacterial mouthwash, look for the following ingredients:
- Chlorhexidine, which is effective against a wide range of bacteria and can help prevent gum disease.
- Cetylpyridinium chloride, which can help kill bacteria and reduce plaque and gingivitis.
- Essential oils like eucalyptol, menthol, and thymol, which have antibacterial properties and can help freshen breath.
You can find antibacterial mouthwash in various forms, including liquid and gel. Some popular brands include Listerine, Crest, and Colgate.
Always follow the instructions on the label and consult with your dentist or pharmacist if you have any questions or concerns. By incorporating antibacterial mouthwash into your oral hygiene routine, you can help prevent infection and maintain good oral health.
Sensitive Teeth Treatment
Millions of people worldwide suffer from sensitive teeth. If you’re one of them, you know how painful it can be to consume hot or cold foods and drinks.
You can find relief from sensitive teeth treatment options available at your local pharmacy.
The most common type of treatment is desensitizing toothpaste, which contains ingredients like potassium nitrate or strontium chloride.
These ingredients work by blocking the dentinal tubules in your teeth, reducing the sensitivity.
You can use these toothpastes as you’d regular toothpaste, but be patient as it may take a few weeks to notice any improvement.
Another option is a desensitizing mouthwash or varnish, which contains similar ingredients to desensitizing toothpaste.
These products work quickly and can provide fast relief for sensitive teeth.
You can also use a toothpaste specifically designed for sensitive teeth and gum problems if you have both issues.
Always read the label and follow the manufacturer’s instructions when using any of these products to treat sensitive teeth.
Mouth Sore Remedies Available
If you’ve ever bitten the inside of your cheek or tongue, you know how painful a mouth sore can be.
These painful ulcers can make eating, drinking, and even speaking uncomfortable.
Fortunately, you can find mouth sore remedies at your local pharmacy to help alleviate the discomfort.
To manage mouth sore pain, consider the following over-the-counter (OTC) products:
- Topical anesthetics: These products, such as Orajel or Anbesol, contain ingredients like benzocaine or lidocaine that numb the affected area, providing temporary pain relief.
- Protective gels or films: Products like Orabase or Gelclair create a barrier over the mouth sore, shielding it from further irritation and promoting healing.
- Pain-relieving lozenges: Lozenges like Chloraseptic or TheraFlu can help soothe mouth sore pain and reduce inflammation.
When using these products, always follow the instructions and take note of any recommended usage limits.
If your mouth sore persists or worsens, it’s a good idea to consult your dentist or doctor for further evaluation and guidance.
Bad Breath Control Products
Bad breath can be a source of embarrassment and anxiety, especially in social situations. You’re probably aware that brushing and flossing regularly can help minimize bad breath, but sometimes you need a little extra help.
That’s where bad breath control products come in. You can find a variety of products at your local pharmacy that can help you tackle bad breath.
Mouthwashes are one of the most popular bad breath control products. Many mouthwashes contain antibacterial ingredients that help kill bacteria in your mouth that can cause bad breath.
You can choose from a range of flavors and ingredients, including those that are specifically designed to target bad breath. Another option is sugar-free gum and mints. These can help stimulate saliva production, which can help wash away bacteria and food particles that can cause bad breath.
Look for products that carry the ADA Seal of Acceptance, which indicates that they’ve met certain standards for safety and effectiveness.
Frequently Asked Questions
Can I Use Oral Health Products During Pregnancy?
You’re probably wondering if it’s safe to use certain products while pregnant. Generally, you can use most oral health products, but you should always check the ingredients and consult your doctor or dentist before using anything new.
Do Oral Health Products Expire After Opening?
You’re probably wondering if products expire after opening. Generally, they do, but it’s not always the case. Check the product’s packaging for a Period After Opening (PAO) symbol, which indicates its shelf life after opening.
Are Natural Ingredients Suitable for All Oral Issues?
You might think natural ingredients are suitable for all issues, but it’s not always the case. Some oral problems require specific treatments. When dealing with oral issues, you should consider what’s causing the problem and choose accordingly.
Can I Give Oral Health Products to Pets?
You shouldn’t give your pets human oral health products without consulting a vet. Their teeth and gum needs differ from yours, and some ingredients can be toxic to them, so it’s best to get pet-specific products.
Do I Need a Prescription for Oral Health Products?
You usually don’t need a prescription for over-the-counter oral health products, but it depends on the type and strength of the product. Some products, like antibiotics or strong painkillers, often require a prescription from a doctor.
Conclusion
You can find a variety of oral health drugs at local pharmacies to address common issues. From pain relief medications for toothaches to antibacterial mouthwashes and desensitizing toothpaste for sensitive teeth, many treatments are available over-the-counter. You can also find remedies for mouth sores and bad breath. Always read labels carefully and follow instructions Buy AAA+ Blu e Puni shers proper use, consulting a dentist or doctor if your symptoms persist or worsen. This helps ensure effective treatment and optimal oral health.