

Exploring New Space Horizons With Cutting-Edge Thruster Blast Technologies
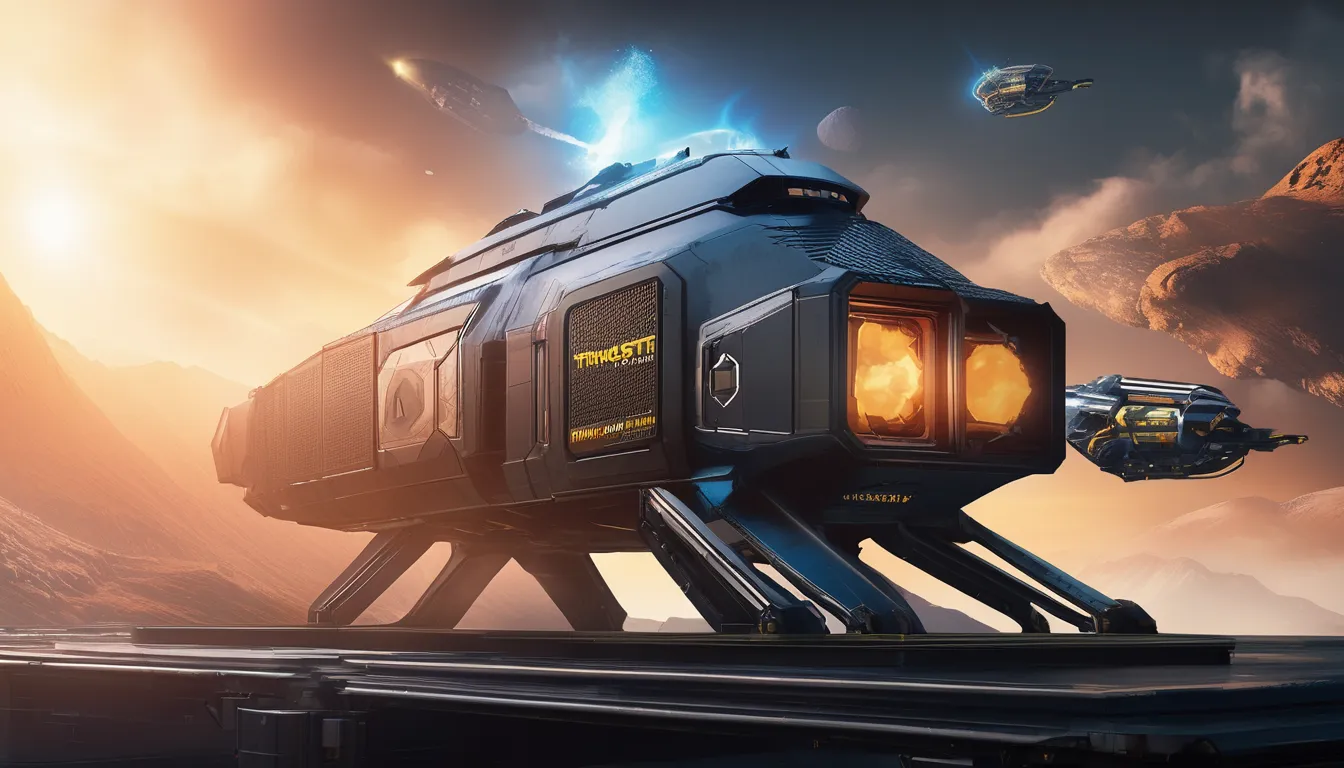
As you consider the vast expanse of uncharted space, you're likely wondering what's driving the push for deeper exploration. The answer lies in advancements in thruster blast technologies, which are revolutionizing the way spacecraft travel through space. With the ability to achieve higher specific impulse and reduce fuel consumption, next-generation propulsion systems are poised to make a significant impact. But what exactly does this mean for the future of space travel? How will nuclear electric propulsion systems and advanced ion engines shape the course of deep space exploration, and what breakthroughs can we expect in the coming years?
Advanced Ion Engine Propulsion
Advanced ion engine propulsion is a cutting-edge technology that's pushing the boundaries of space exploration. By harnessing the power of ions, you can achieve higher speeds and greater efficiency than traditional chemical propulsion systems. Ion engines work by accelerating charged particles, such as xenon gas, to generate thrust.
You can use this technology to propel a spacecraft to incredible distances. For example, NASA's Deep Space 1 spacecraft, which was powered by an ion engine, traveled over 4.8 billion kilometers during its mission.
This is made possible by the high specific impulse, or efficiency, of ion engines, which can achieve speeds of up to 30-40 kilometers per second.
As you explore the vastness of space, advanced ion engine propulsion is a critical component of many spacecraft. By leveraging the power of ions, you can design more efficient and longer-lasting missions.
Whether you're traveling to Mars or beyond, this technology is helping to make interplanetary exploration a reality. With its high efficiency and reliability, ion engine propulsion is a key enabler of the next generation of space missions.
Nuclear Electric Propulsion Systems
Stepping up the power game in space exploration, nuclear electric propulsion systems offer a robust alternative to traditional chemical propulsion and advanced ion engines. You're essentially combining a nuclear reactor with an electric propulsion system to generate thrust.
The reactor produces electricity, which is then used to power an electric thruster, such as an ion engine or a Hall effect thruster.
The key advantage of nuclear electric propulsion systems is their high specific impulse, which is a measure of efficiency.
They can achieve specific impulses that are two to three times higher than traditional chemical propulsion systems, making them ideal for deep space missions.
Additionally, these systems can provide a continuous thrust over a long period, which is essential for missions that require a lot of propellant.
As you consider nuclear electric propulsion systems, you'll also appreciate their potential for in-space assembly and manufacturing.
They can provide a reliable source of power Thruster finance a wide range of applications, from life support systems to communication equipment.
This versatility makes them an attractive option for future space missions.
Future of Space Thruster Technology
As nuclear electric propulsion systems continue to push the boundaries of space exploration, you're likely wondering what's on the horizon for space thruster technology. One area that's gaining traction is advanced ion engine designs.
These engines use electrical energy to accelerate charged particles, such as xenon gas, to generate thrust. You'll see significant improvements in specific impulse and overall efficiency, enabling longer-duration missions to the outer planets and beyond.
Another area of focus is the development of more efficient power sources, such as advanced solar panels and radioisotope thermoelectric generators.
These power sources will enable longer-term missions and reduce the mass of the propulsion system, making it easier to launch and maneuver spacecraft.
You can also expect advancements in materials science to play a key role in the development of next-generation thrusters.
New materials and technologies will enable the creation of lighter, more efficient thrusters that can withstand the harsh conditions of space.
These advancements will be crucial for future deep space missions and will help you explore new frontiers.
Hall Effect Thruster Innovation
With the increasing demand for efficient propulsion systems, Hall Effect Thrusters (HETs) have become a staple in modern space missions. You're likely familiar with their high efficiency and specific impulse compared to traditional chemical propulsion systems.
As you consider the design of your next space mission, you're probably thinking about how to optimize your HETs for maximum performance.
HET innovation has focused on improving the thruster's discharge channel and ionization process. Researchers have experimented with different magnetic field configurations to increase the thruster's efficiency and reduce erosion of the discharge channel walls.
You'll also find advancements in HET power processing units, which enable more precise control over the thruster's operation and improve overall system reliability.
As you explore the capabilities of HETs, consider the benefits of clustered thruster configurations. By combining multiple HETs, you can achieve higher thrust levels while maintaining the benefits of high specific impulse.
This approach has shown great promise in recent space missions, demonstrating the versatility and potential of HETs in deep space exploration. By leveraging these innovations, you can create more efficient and effective propulsion systems for your next space mission.
Next Generation Plasma Propulsion
Beyond the advancements in Hall Effect Thrusters lies a new frontier in propulsion technology – Next Generation Plasma Propulsion. You're on the cusp of a revolution that's redefining space travel.
This cutting-edge technology leverages the unique properties of plasmas to generate thrust, enabling spacecraft to travel farther and faster than ever before.
Next Generation Plasma Propulsion systems utilize advanced magnetic fields to ionize and accelerate propellant, resulting in higher specific impulse and greater efficiency.
You'll experience enhanced maneuverability and reduced fuel consumption, making long-duration missions more feasible.
As you delve into the world of Next Generation Plasma Propulsion, you'll discover innovative approaches like magnetized target fusion and field-reversed configurations.
These designs offer improved stability and increased thrust-to-power ratios, positioning them as prime candidates for future deep space missions.
Frequently Asked Questions
What Are the Environmental Effects of Space Thruster Technologies on Earth?
You're right to wonder about the environmental effects of space thrusters on Earth. They don't directly impact Earth, but launching and testing them can cause noise pollution, emit toxic chemicals, and disturb local ecosystems nearby.
Can Space Thrusters Be Used for Interstellar Travel in the Near Future?
You're likely wondering if space thrusters can propel you to other star systems soon. While current tech is promising, interstellar travel remains a distant dream, requiring significant advancements in propulsion, life support, and radiation shielding.
How Do Space Thrusters Affect the Human Body During Long Missions?
When you're on a long space mission, you'll experience effects from space thrusters like prolonged exposure to G-forces, which can cause fatigue, vision issues, and muscle weakness due to your body's continuous acceleration and deceleration.
Are There Any Alternative Materials for Building Thruster Components?
You're looking for alternatives to traditional thruster components. Researchers are exploring lightweight, high-temperature-resistant materials like carbon fiber and advanced ceramics, which could increase efficiency and reduce wear on thrusters during extended missions.
What Role Do Private Companies Play in Space Thruster Technology Development?
You're likely to find private companies driving innovation in space thruster technology, offering unique solutions and pushing traditional boundaries. They invest heavily in research, collaborate with governments, and accelerate development to stay competitive.
Conclusion
You're on the cusp of a space travel revolution, thanks to cutting-edge thruster technologies. As next-generation systems emerge, you'll witness unprecedented speed and agility in spacecraft. Advanced ion engines, Hall Effect Thrusters, and nuclear electric propulsion systems are pushing boundaries. The future of space exploration is bright, with plasma propulsion systems poised to redefine the possibilities. You'll soon be exploring new space horizons like never before, and the universe will be full of endless possibilities.
What to Avoid When You Buy Outboard Engines for the First Time

When buying an outboard engine for the first time, you’re likely to be bombarded with complex specifications and options. While it’s exciting to get out on the water, making an uninformed decision can have serious consequences. You might end up with an engine that’s incompatible with your boat, inefficient, or prone to breakdowns. To avoid these costly mistakes, it’s imperative to understand what to look out for. In this discussion, we’ll explore the most common pitfalls to watch out for when buying an outboard engine, helping you make a more informed decision and get the most out of your purchase.
Key Takeaways
- Ignore boat compatibility issues, as they can lead to inefficient per Yamaha 150 PS EFI V-MAX SHO for sale online mance, reduced fuel economy, and safety issues.
- Overlook maintenance costs, such as oil changes, propeller replacements, and tune-ups, to avoid financial surprises.
- Buying an outboard engine without a warranty can leave you with costly repairs and no financial protection.
- Disregard fuel efficiency, as it can significantly impact operating costs and the overall cost of ownership.
- Underestimating horsepower needs can result in poor performance, decreased efficiency, and safety issues.
Ignoring Boat Compatibility Issues
When buying an outboard engine for the first time, one of the biggest mistakes you can make is ignoring boat compatibility issues. You’ll need to guarantee the engine you choose is compatible with your boat’s size, weight, and hull type.
A mismatch can lead to inefficient performance, reduced fuel economy, and even safety issues.
You should start by checking your boat’s manual or manufacturer’s website for engine recommendations. Think about factors such as horsepower, propeller size, and shaft length.
Don’t assume a more powerful engine is always better, as it can put excessive strain on your boat’s hull and transom.
It’s also essential to think about the type of boat you have. For example, if you have a shallow-draft boat, you’ll need an engine with a higher gear ratio to maintain adequate speed.
If you have a larger boat, you may need a more powerful engine to achieve the desired performance.
Overlooking Maintenance Costs
Ignoring the true cost of owning an outboard engine can lead to financial headaches down the line. When you’re buying an outboard engine for the first time, you’re likely focused on the initial purchase price.
However, you should also consider the ongoing maintenance costs. These can add up quickly and include expenses such as oil changes, propeller replacements, and tune-ups.
You’ll also need to factor in the cost of replacement parts, such as spark plugs and fuel filters. Additionally, if you plan to store your boat in saltwater, you’ll need to account for the increased maintenance costs associated with corrosion.
Crucial to your decision is researching the maintenance requirements for the specific engine you’re interested in and factoring these costs into your overall budget.
Buying Without Warranty
You’ve factored in the maintenance costs of your outboard engine, but there’s another aspect to think about: the warranty. When buying an outboard engine for the first time, it’s vital to prioritize a warranty.
A warranty provides you with financial protection in case the engine fails or requires repairs due to manufacturing defects or poor workmanship. Without a warranty, you’ll be responsible for covering the costs of repairs, which can be expensive and draining on your finances.
When evaluating a warranty, consider the length of coverage, what’s included, and the process for filing claims. An exhaustive warranty should cover parts and labor for a reasonable period, such as 3-5 years.
Be wary of sellers who don’t offer a warranty or try to sell you a separate warranty as an add-on. This could be a sign of a low-quality engine or a seller trying to make extra profit. Always purchase from a reputable dealer or manufacturer that stands behind their products with a reliable warranty.
Disregarding Fuel Efficiency
| Engine Type | Fuel Efficiency (mpg) | Operating Costs |
|---|---|---|
| 2-Stroke Outboard | 2-3 mpg | Higher operating costs due to frequent oil changes and higher fuel consumption |
| 4-Stroke Outboard | 4-6 mpg | Lower operating costs due to improved fuel efficiency and less frequent oil changes |
| Direct Fuel Injection (DFI) | 6-8 mpg | Lowest operating costs due to advanced fuel injection technology |
| Electric Outboard | N/A | Zero operating costs for fuel, but higher upfront costs |
When shopping for an outboard engine, consider the fuel efficiency of each model. Look for engines with advanced fuel injection technology, such as DFI, or electric outboards for the best fuel efficiency. Don’t overlook this critical factor, or you might end up paying more than you need to in the long run.
Underestimating Horsepower Needs
When it comes to buying an outboard engine, one mistake many first-time buyers make is selecting a model that’s underpowered for their needs. You’ll want to ponder the size and weight of your boat, as well as the number of passengers you plan to carry.
A general rule of thumb is to calculate the minimum horsepower required based on your boat’s weight, then add 10-20% for extra power. Don’t forget to factor in any additional equipment, such as a trailer or water sports gear, which can also impact performance.
Underestimating horsepower needs can lead to poor performance, decreased efficiency, and potentially even safety issues. If your engine is underpowered, it may struggle to reach top speed or handle rough waters. This can also cause excessive wear and tear on the engine, leading to costly repairs down the line.
To avoid these issues, take the time to research and calculate your horsepower needs carefully before making a purchase. Ponder consulting with a marine expert or dealer to guarantee you’re getting the right engine for your specific needs.
Frequently Asked Questions
What Is the Average Lifespan of an Outboard Engine?
You’re probably wondering what the average lifespan of an outboard engine is. On average, you can expect it to last about 1,500 to 2,000 hours or around 8-10 years with regular maintenance and proper care.
How Often Should Propellers Be Inspected and Replaced?
The “hidden heroes” of your outboard engine are its propellers. You’ll want to give them some love regularly. Inspect them every 50-100 hours, or once a year, and replace them every 3-5 years or when damaged.
Can I Install an Outboard Engine Myself?
You’re considering installing an outboard engine yourself, but it’s not recommended unless you’re experienced with mechanical work. You’ll need proper training and tools to guarantee a safe and correct installation, or you’ll risk damaging the engine.
What Are the Benefits of a Four-Stroke Outboard Engine?
You’re taking the plunge into outboard engine shopping. When considering a four-stroke engine, you’ll reap benefits like lower emissions, quieter operation, and improved fuel efficiency, making it a cost-effective choice in the long run.
How Do I Store an Outboard Engine During Winter?
You’ll store your outboard engine in a dry, climate-controlled area, away from direct sunlight and moisture. Drain the fuel, change the oil, and grease moving parts before covering it tightly to prevent corrosion and damage.
Conclusion
Don’t let your dream boat become a sinking ship. Buying outboard engines for the first time can be a treacherous sea, but being aware of the icebergs ahead can save you from disaster. By piloting past the hidden dangers of compatibility issues, maintenance costs, warranty, fuel efficiency, and horsepower needs, you’ll chart a course for a smooth journey. Stay alert, and you’ll avoid the wreckage of costly mistakes.
The Ultimate Guide to Boston Logan Limo Services

When you’re planning a trip to or from Boston Logan Airport, you’re probably not looking forward to the hassle of navigating traffic and parking. That’s where a reliable limo service comes in – but with so many options available, it can be tough to choose the right one. You’ll want to consider factors like reputation, licenses, and prices, but where do you even start? As you prepare for your trip, you’re likely to have many questions about what to expect and how to make the most of your limo experience – let’s break it down and find some answers.
Choosing the Right Limo Company
When you’re planning a trip to or from Boston Logan Airport, choosing the right limo company can make all the difference. With so many options available, it’s essential to do your research and select a reputable and reliable service provider.
Start by checking online reviews from past customers to get an idea of the company’s level of service and professionalism.
Next, verify the company’s licenses and certifications, such as a valid Massachusetts chauffeur’s license and a certified commercial insurance policy. This will ensure that you’re dealing with a legitimate and responsible business.
You should also check if the company is a member of any industry associations, such as the National Limousine Association.
Compare prices and services offered by different companies, but don’t just focus on the cheapest option.
Consider the type of vehicle you need, the number of passengers, and any special requirements you may have.
Services and Amenities Offered
As you book a limo service for your trip to or from Boston Logan Airport, you’ll want to know what services and amenities are included in the package. Most limo companies offer a range of services to make your travel experience more comfortable and convenient.
These may include complimentary Wi-Fi, bottled water, and snacks. You may also have the option to choose from different types of vehicles, such as sedans, SUVs, or stretch limousines.
In addition to basic transportation services, some limo companies offer additional amenities like flight tracking, luggage assistance, and meet-and-greet services.
Some companies may also provide child car seats or booster seats if needed. You may also have the option to request a specific type of music or temperature in the vehicle.
When booking a limo service, be sure to ask about the specific services and amenities included in the package so you know what to expect. This will help you make an informed decision and ensure that your travel experience meets your needs. By knowing what services and amenities are included, you can plan your trip accordingly.
Factors Affecting Limo Prices
Several key factors influence the prices of Boston Logan limo services, and understanding these can help you plan your budget.
The type of vehicle you choose is one of the primary factors that will affect the price. Luxury sedans, SUVs, and stretch limousines come at different price points.
- The type of vehicle you choose (e.g. luxury sedan, SUV, or stretch limousine)
- The number of passengers you’re traveling with and the amount of luggage you have
- The time of day and day of the week (peak hours and weekend rates may be higher)
Additionally, the distance and route of your trip will also impact the cost.
If you’re traveling to a farther location, you’ll be charged more than a shorter trip. Some limo services may also charge extra for tolls, parking, and additional amenities.
Be sure to ask about any additional fees when booking your limo service. By considering these factors, you’ll be able to make an informed decision and choose a Boston Logan limo service that fits your needs and budget.
Boston Logan Airport Layout
Boston Logan Airport Layout
How familiar are you with Boston Logan Airport’s layout? Understanding the airport’s layout is crucial to ensure a smooth pickup or drop-off experience for your limo service. Boston Logan Airport has four terminals: A, B, C, and E. Each terminal is designated Boston Limo specific airlines, and it’s essential to know which terminal your flight is arriving at or departing from.
| Terminal | Airlines |
|---|---|
| A | Delta Air Lines, WestJet, and all other airlines except those listed below |
| B | American Airlines, US Airways, and Spirit Airlines |
| C | JetBlue Airways, Cape Air, and all other airlines except those listed below |
| E | All international flights |
When booking your limo service, make sure to provide the correct terminal information to avoid any confusion. If you’re unsure which terminal your flight is arriving at or departing from, you can check with your airline or the airport’s website for more information. Knowing the airport layout will help you navigate the airport with ease and ensure a hassle-free experience with your limo service.
Booking and Payment Process
You’ve got your airport layout down, now it’s time to book your limo service. This process is relatively straightforward, but it’s essential to understand the steps involved to ensure a seamless experience.
When booking a limo service from Boston Logan, you’ll typically need to provide your flight information, including the date, time, and terminal number. You’ll also need to specify the type of vehicle you require and the number of passengers.
Here are some key things to consider when booking and paying for your limo service:
- Book in advance: It’s recommended to book your limo service at least 24 hours in advance to ensure availability, especially during peak travel times.
- Check for discounts: Look for discounts or promotions that may be available, such as corporate rates or package deals.
- Read the fine print: Carefully review the terms and conditions of your booking, including any cancellation policies or fees.
When paying for your limo service, most companies accept major credit cards, such as Visa, Mastercard, or American Express. Some may also accept cash or online payment methods like PayPal.
Conclusion
You’ve made it to the end of the ultimate guide to Boston Logan limo services. Now you’re equipped to choose a reliable and professional limo company that meets your needs. By considering key factors, comparing prices and services, and booking in advance, you’ll have a smooth and hassle-free experience. Remember to provide your flight information and specify your needs to ensure a seamless pickup and drop-off. With this guide, you’re ready to roll in style.
How to Choose the Right Flower Delivery Service for You

When you’re looking for a flower delivery service, it’s easy to get overwhelmed by the numerous options available. You want to make sure the flowers you send are not only beautiful but also fresh and handled with care. As you start your search, it’s essential to consider what matters most to you – is it the quality of the flowers, the convenience of delivery options, or the level of customer support? By identifying your priorities, you’ll be better equipped to make an informed decision. But where do you start, and what should you look for in a reliable flower delivery service?
Evaluating Flower Quality Standards
When looking into a flower delivery service, it’s essential to take a closer look at their flower quality standards. You want to make sure the Florist Mernda s you send will arrive fresh and beautiful, making a great impression on the recipient.
Check if the service has a clear description of their flower sourcing and handling process. Do they source their flowers from local farms or reputable suppliers? How do they store and handle the flowers to maintain their quality?
Look for services that provide high-quality photos of their arrangements and bouquets. This will give you an idea of the attention to detail and care they put into creating their arrangements.
You should also check if they offer a satisfaction guarantee. If the recipient isn’t satisfied with the flowers, can you get a refund or a replacement? A reputable flower delivery service will stand behind the quality of their flowers and offer a guarantee.
Consider these factors when evaluating flower quality standards to ensure you choose a service that meets your expectations.
Understanding Delivery Options
As you narrow down your options for a flower delivery service, look into the various delivery options they offer, considering what works best for you and the recipient.
Check if they provide same-day, next-day, or standard delivery options. Some services may also offer express delivery for an additional fee.
Consider the recipient’s schedule and preferences when choosing a delivery option.
You’ll also want to know if the service delivers on weekends and holidays.
Some services may have limited hours or not deliver on certain days, which could impact when your flowers arrive.
Additionally, check if they offer delivery tracking and updates, so you can stay informed about the status of your order.
Lastly, consider the delivery area and any potential restrictions.
Some services may only deliver within a certain radius or to specific locations.
Make sure the service you choose can deliver to the recipient’s location and that there are no additional fees for delivery to that area.
Comparing Prices and Packages
Comparing prices and packages from different flower delivery services is essential to get the best value for your money. When comparing prices, consider the cost of the bouquet or arrangement, delivery fees, and any additional services like gift wrapping or chocolates.
Be sure to factor in any promotions or discounts that may be available.
Check the types of packages offered by each service, including the variety of flowers, arrangements, and vases. Some services may offer pre-made bundles or the option to create your own custom arrangement.
Consider the recipient’s preferences and the occasion when choosing a package.
Pay attention to the quality of the flowers and arrangements, as cheaper options may not necessarily be the best value. Look for services that use fresh, high-quality flowers and have a good reputation for delivering beautiful arrangements.
Assessing Customer Service
You’ve compared prices and packages, and now it’s time to evaluate the level of service you’ll receive from each flower delivery company.
Assessing customer service is crucial, as it can significantly impact your experience. You want to ensure that the company you choose will handle any issues or concerns you may have promptly and professionally.
When evaluating customer service, consider how each company interacts with you.
Do they’ve multiple channels of communication, such as phone, email, and live chat? Are their customer support hours convenient for you? You can test their responsiveness by reaching out with a question or concern and see how quickly they respond.
Some key aspects of customer service to consider include:
- How companies handle special requests, such as same-day delivery or custom arrangements
- Whether they offer any guarantees, such as freshness or satisfaction guarantees
- How they handle issues, such as damaged flowers or incorrect orders
Reading Reviews and Ratings
With numerous flower delivery companies to choose from, one of the most reliable ways to gauge their performance is by reading reviews and ratings from past customers. You can find these on the company’s website, social media, or review platforms like Google or Yelp.
Pay attention to the overall rating and the number of reviews. A high rating with few reviews mightn’t be as reliable as a slightly lower rating with hundreds of reviews.
When reading reviews, look for specific details about the customer’s experience, such as the quality of the flowers, delivery time, and customer service. Be wary of fake reviews that seem overly positive or negative.
You can also filter reviews by date to see if the company has improved or deteriorated over time.
It’s also a good idea to check if the company responds to reviews, both positive and negative. This shows that they value customer feedback and are willing to make things right when something goes wrong.
Conclusion
By considering these factors, you’ll be able to find a flower delivery service that meets your needs. Look for services that prioritize quality, convenience, and customer satisfaction. Don’t settle for anything less, and don’t be swayed by fake reviews or low prices – your special occasion or gift recipient is worth it. Take your time, do your research, and choose a service that will deliver beautiful, fresh flowers and a great experience.
The Best Crypto Recovery Services What Users Are Saying

If you’re a victim of cryptocurrency theft or loss, you’re likely desperate for a solution. You’re not alone – thousands of users have turned to top crypto recovery services to help them recover their stolen or lost funds. But which services can you trust? A closer look at user reviews and ratings reveals a complex picture of professionalism, expertise, and transparency – but also high fees and lengthy recovery times. As you consider your options, it’s essential to separate the reputable services from the scams. So, what sets the best crypto recovery services apart?
Top Crypto recovery companies for hire Recovery Services
When dealing with cryptocurrency losses due to scams or hacks, finding the right recovery service can be the difference between getting your funds back and losing them forever.
You need to research top crypto recovery services that have a proven track record of success.
Scams and hacks can be devastating, and you don’t want to risk losing more money by choosing an untrustworthy service.
Look for recovery services that are transparent about their process and fees. A reputable service will provide you with clear information about their methods and costs upfront.
Some top crypto recovery services specialize in specific types of scams or hacks, so it’s essential to find one that has experience with your particular situation.
You should also look for services that have a team of experts with a strong understanding of cryptocurrency and blockchain technology.
This expertise will increase your chances of recovering your lost funds.
User Reviews and Ratings
A quick scan of online forums and review platforms can give you an initial sense of a crypto recovery service’s reputation. You’ll notice that many services have mixed reviews, with some users praising their success in recovering lost funds, while others express frustration with the process.
It’s essential to read these reviews critically, paying attention to the specific details of each user’s experience.
When evaluating user reviews, you should look for patterns in the feedback. Do multiple users mention the same strengths or weaknesses? Are there any common issues that crop up repeatedly?
You should also check the overall rating of the service on multiple platforms to get a well-rounded view.
You’ll also want to consider the legitimacy of the reviews themselves. Look for reviews from verified users and be wary of fake or overly promotional reviews.
Factors to Consider
Considering your options for a crypto recovery service, several key factors come into play.
You’ll want to evaluate the service’s success rate and expertise in recovering your specific type of cryptocurrency. Look for services with a proven track record of retrieving lost or stolen funds.
You should also consider the service’s fees and payment structures. Some services charge upfront fees, while others work on a contingency basis, taking a percentage of the recovered funds.
Make sure you understand the fee structure and any additional costs associated with the recovery process.
Furthermore, evaluate the service’s communication and support. A reputable service should be transparent and responsive to your inquiries.
Look for services with a dedicated support team and multiple channels of communication.
Lastly, consider the service’s security measures and data protection policies. Your sensitive information should be safeguarded, and the service should have robust security protocols in place to prevent unauthorized access.
Red Flags to Watch Out
Stepping into the world of crypto recovery services, it’s crucial to watch out for red flags that could put your sensitive information and hard-earned assets at risk. These services often require you to share personal and financial data, making you vulnerable to scams and phishing attacks. To avoid falling prey, keep an eye out for suspicious signs.
| Red Flags | Description |
|---|---|
| No Clear Address | Lack of physical address or contact information raises concerns about the service’s legitimacy. |
| Unsecured Website | Websites without HTTPS or SSL certificates put your data at risk of interception and theft. |
| Unrealistic Promises | Services promising guaranteed recoveries or unusually high success rates may be exaggerating or scamming. |
| Poor Reviews | Overwhelmingly negative reviews or a lack of reviews from reputable sources can indicate a low-quality service. |
| Unclear Fees | Services with unclear or hidden fees can lead to unexpected charges and financial losses.
Choosing the Right Service
You’ve identified potential red flags to watch out for in crypto recovery services, and now it’s time to focus on finding a reliable service that meets your needs.
The first step is to define your specific requirements. What type of cryptocurrency do you need help recovering? Are you looking for a service that specializes in a particular type of recovery, such as wallet recovery or exchange recovery? Make a list of your needs to help narrow down your options.
Once you have a clear idea of what you’re looking for, start researching potential services. Look for reviews and ratings from other users to get an idea of the service’s reputation and effectiveness.
Check the service’s website for information on their process, fees, and success rates. It’s also a good idea to contact the service directly to ask questions and get a sense of their customer support.
By doing your research and comparing different services, you can find a reliable crypto recovery service that meets your needs and helps you recover your lost funds.
Consider your options carefully and don’t rush into a decision.
Conclusion
You’ve got your research and your options laid out. Now it’s time to choose a top crypto recovery service that fits your needs. Remember to prioritize transparency, expertise, and a proven track record. Be cautious of red flags and don’t rush into a decision. Take your time, and don’t be afraid to ask questions. With the right service, you’ll be on your way to recovering your lost or stolen crypto assets in no time.